How to Completely Remove Teams From Windows 11
A comprehensive guide on getting rid of this built-in app
- So Microsoft really wants us to use Teams, but what if we don't actually want to?
- There are a few ways to go about it, depending on what actions you want to take.
- You can remove the app from your taskbar, or stop it from loading at startup.
- Or, if Teams is no longer needed, why not go the extra mile and uninstall it completely?
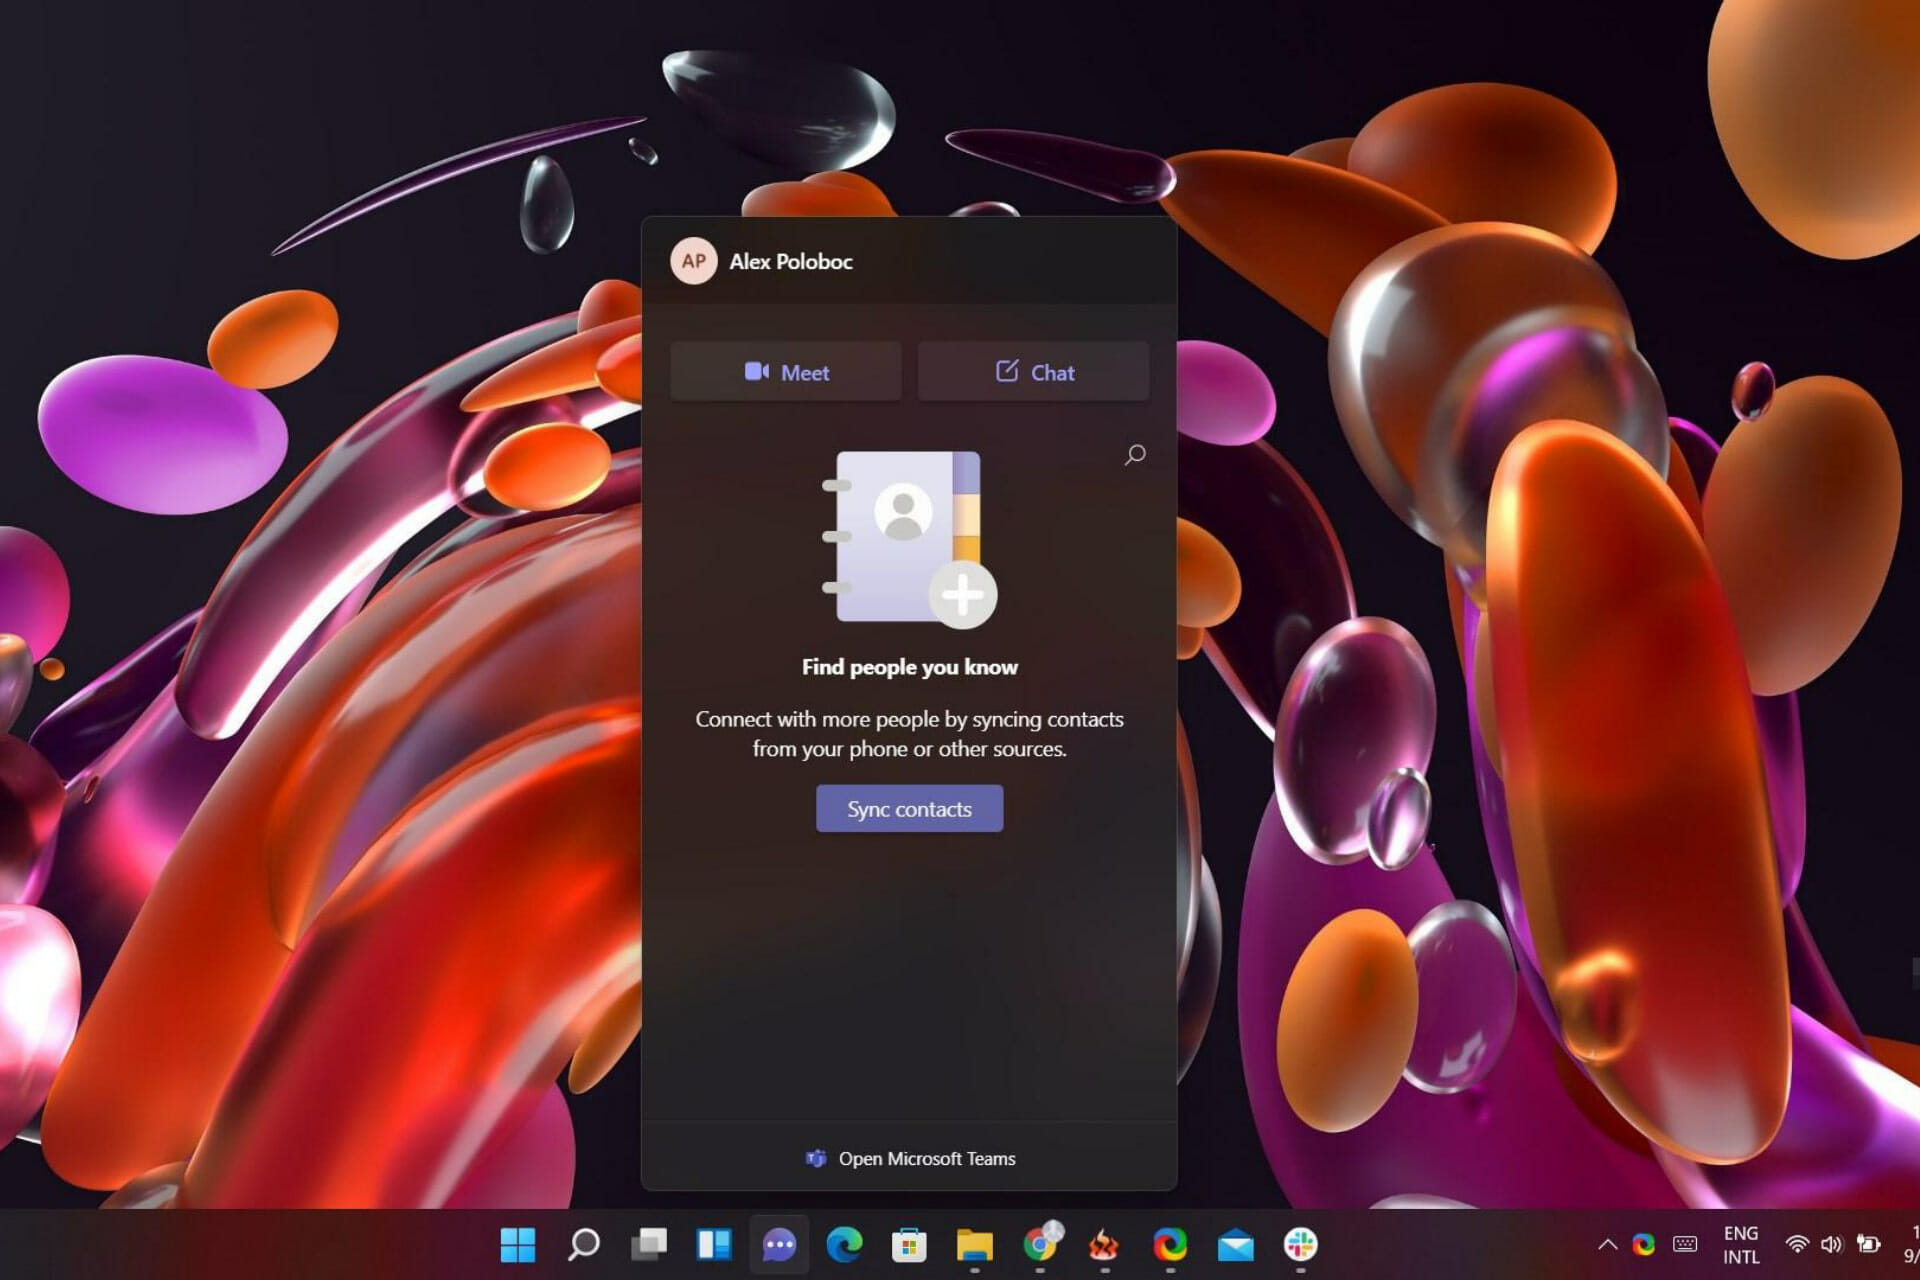
When you install Windows 11 for the first time, you will see that there is a new icon on your taskbar, or it will be new if you haven’t been using Microsoft’s Teams collaboration app lately.
When you hover your cursor above the icon, which looks like a camera inside of a cartoon speech balloon, it will say Chat. If you click on it, you’ll be invited to Meet and chat with friends and family using the application.
But, of course, the obvious question arises: What if you’re not interested in using Teams at all?
How can I remove Teams on Windows 11?
Rest assured that there are several things you can do if you find the push to Teams to be a bit irritating. You can stop the app from automatically loading every time you start your machine.
You can remove the Chat icon from the Taskbar, or, if you really want to go all the way, you can even uninstall it.
1. Stop Teams from loading at startup
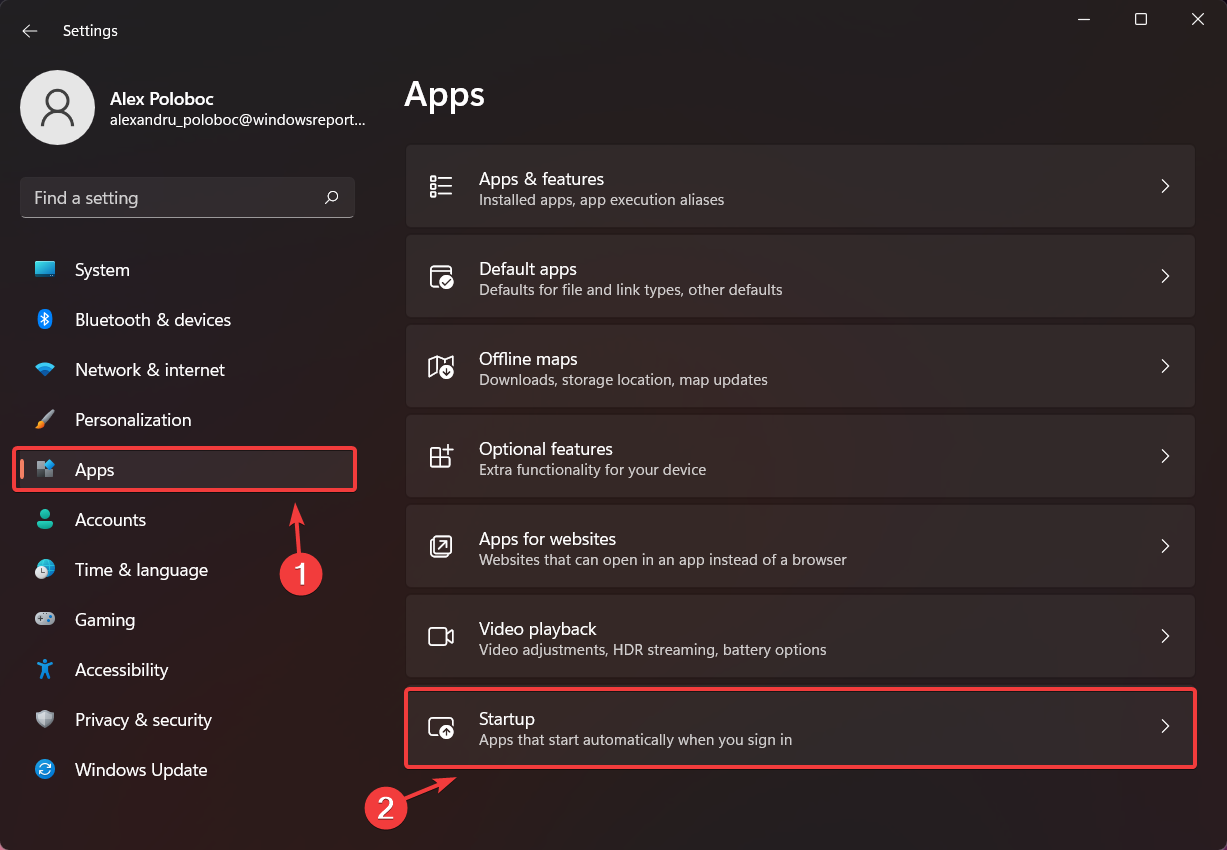
- Press Windows key + I to open the Settings app.
- Select the Apps category, and then press on the Startup button.
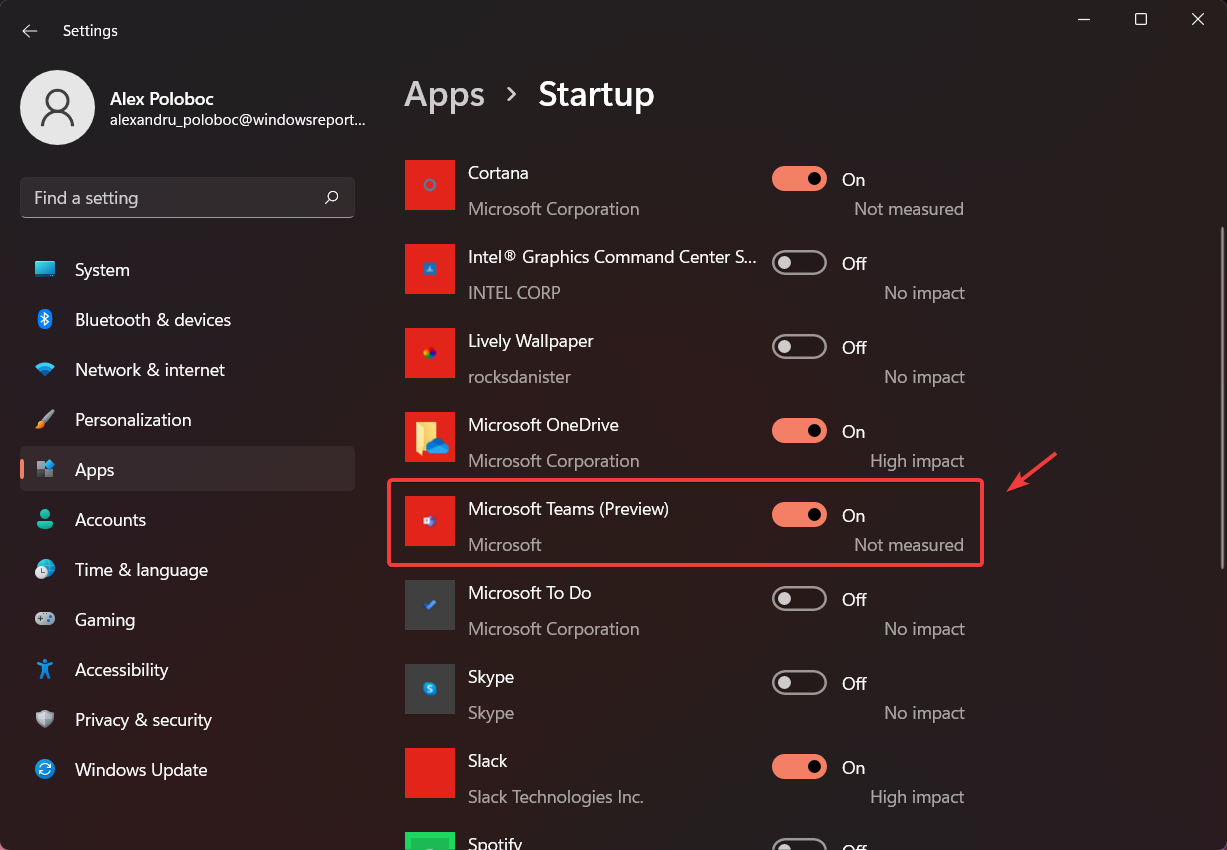
- Locate the Teams app and turn it off.
Also, while you’re in the Startup menu, you can take a look at some of the other apps that automatically start up with your computer that you would like to disable.
2. Remove Microsoft Teams from the taskbar
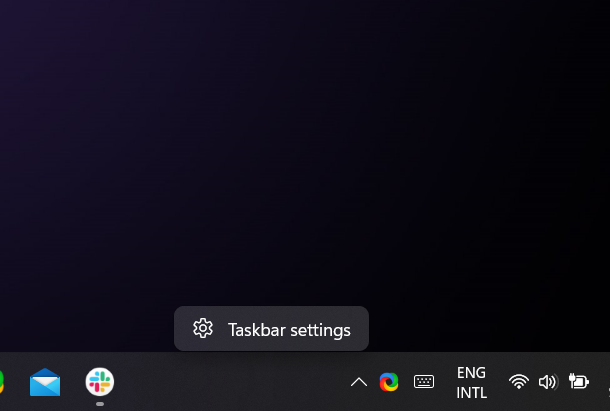
- Right-click on the taskbar and access Taskbar settings.
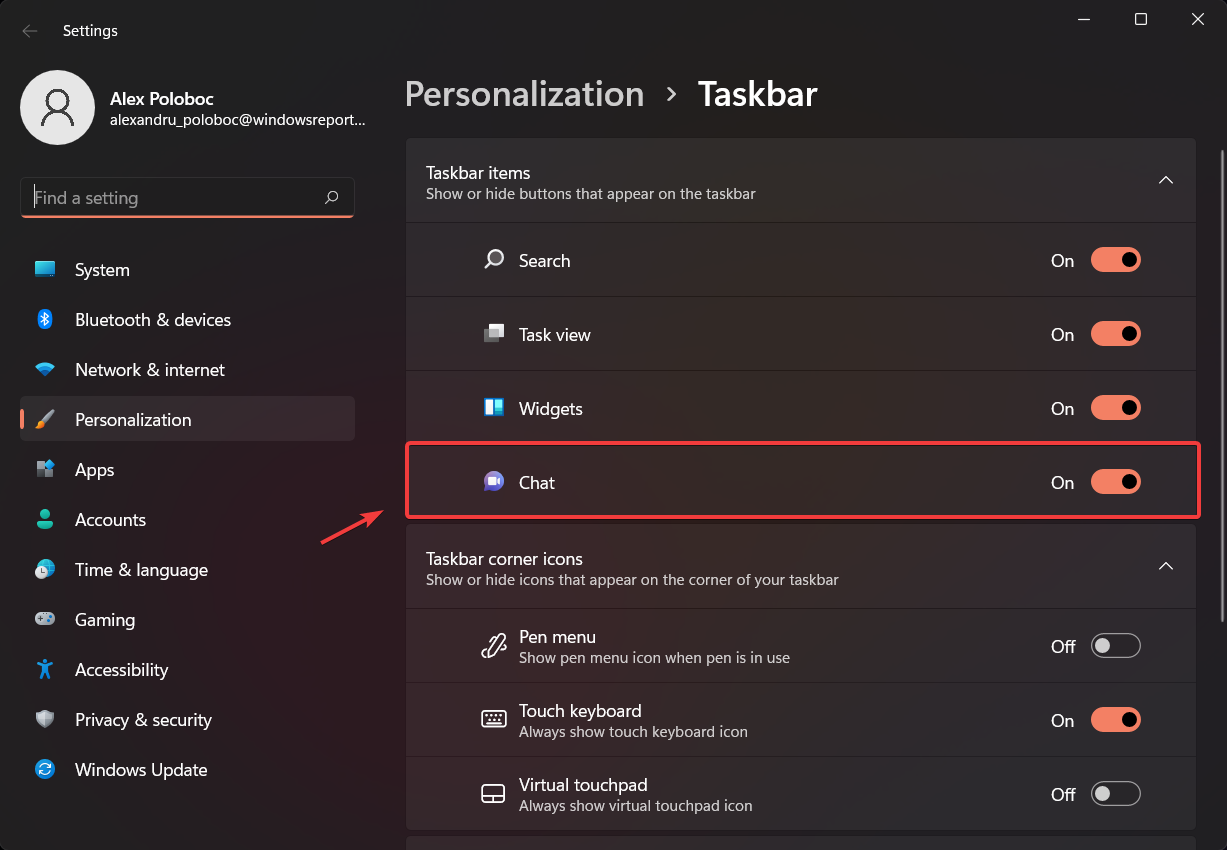
- Under Taskbar items, locate the Chat option and turn it off.
3. Uninstall the app via Settings
1. Press Windows key + I to open the Settings app.
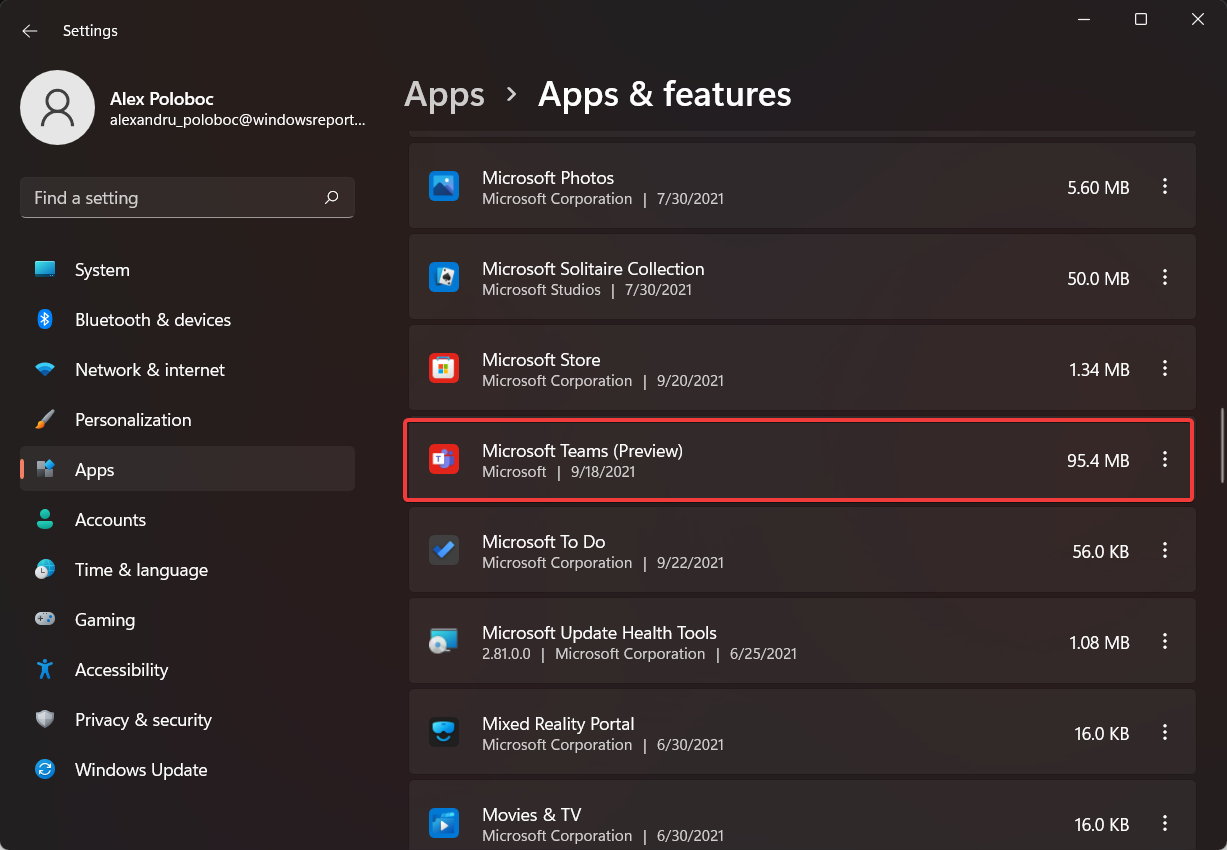
2. Select the Apps category, and then click on Apps & features.
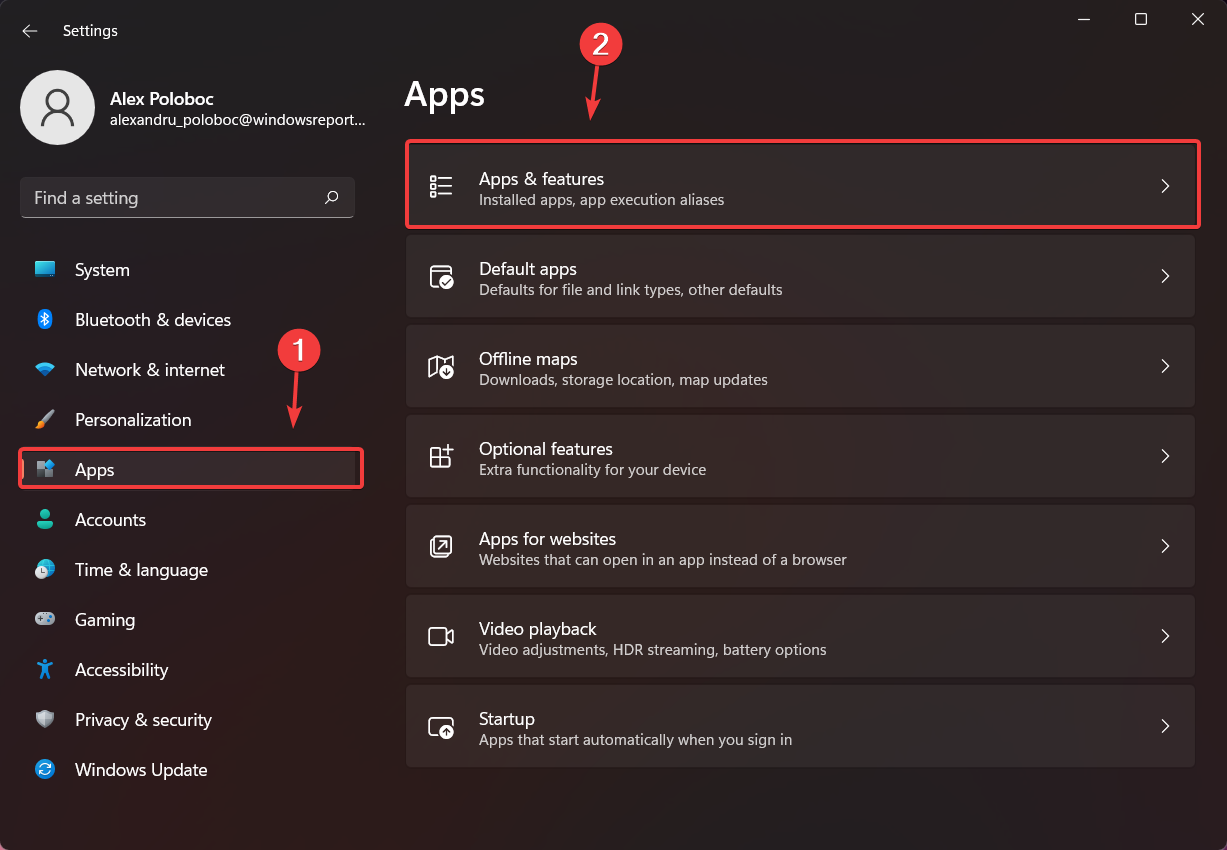
3. Locate the Microsoft Teams app in the list and click on the three vertical dots next to it.
4. Click on Uninstall.
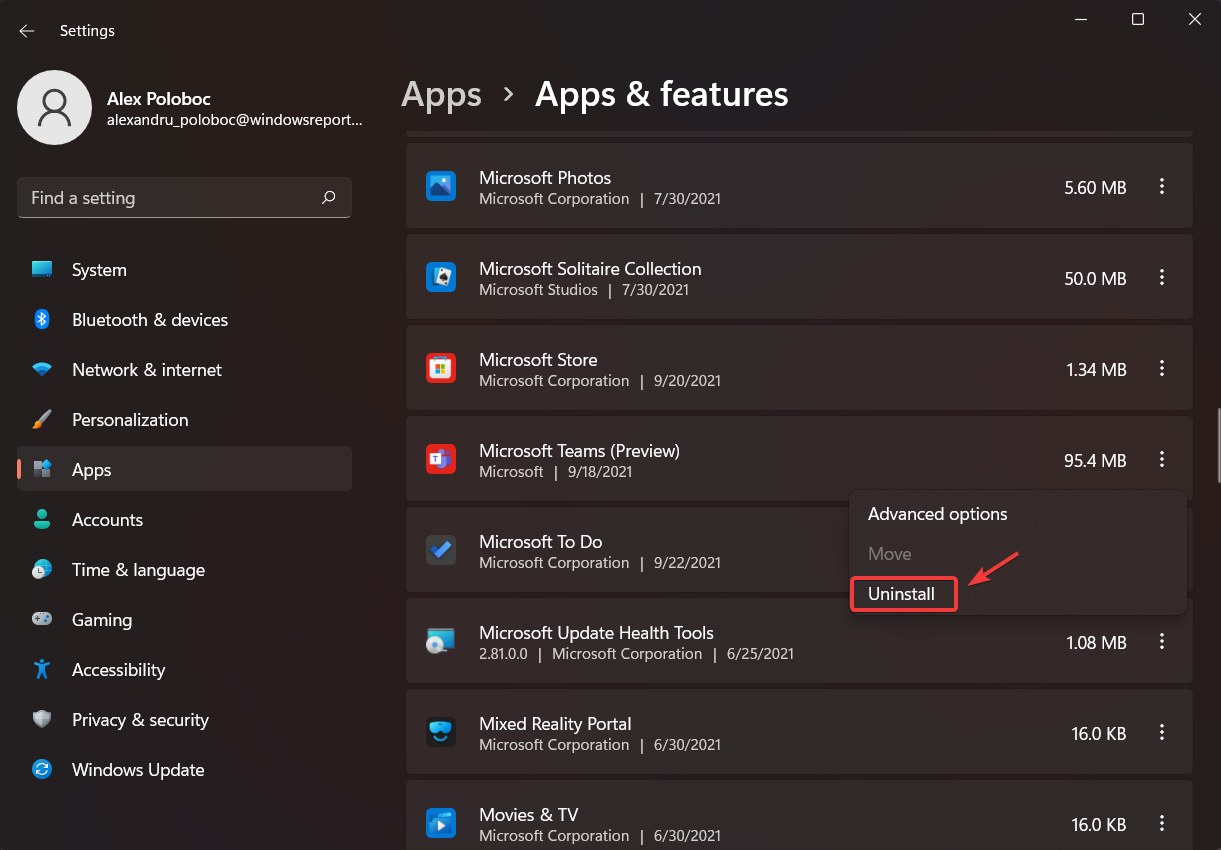
If you want to completely remove Teams from your Windows 11 PC, then you should uninstall it using the built-in Apps and Features settings. In just a few clicks, Teams will be gone forever from your PC.
4. Uninstall Teams using PowerShell
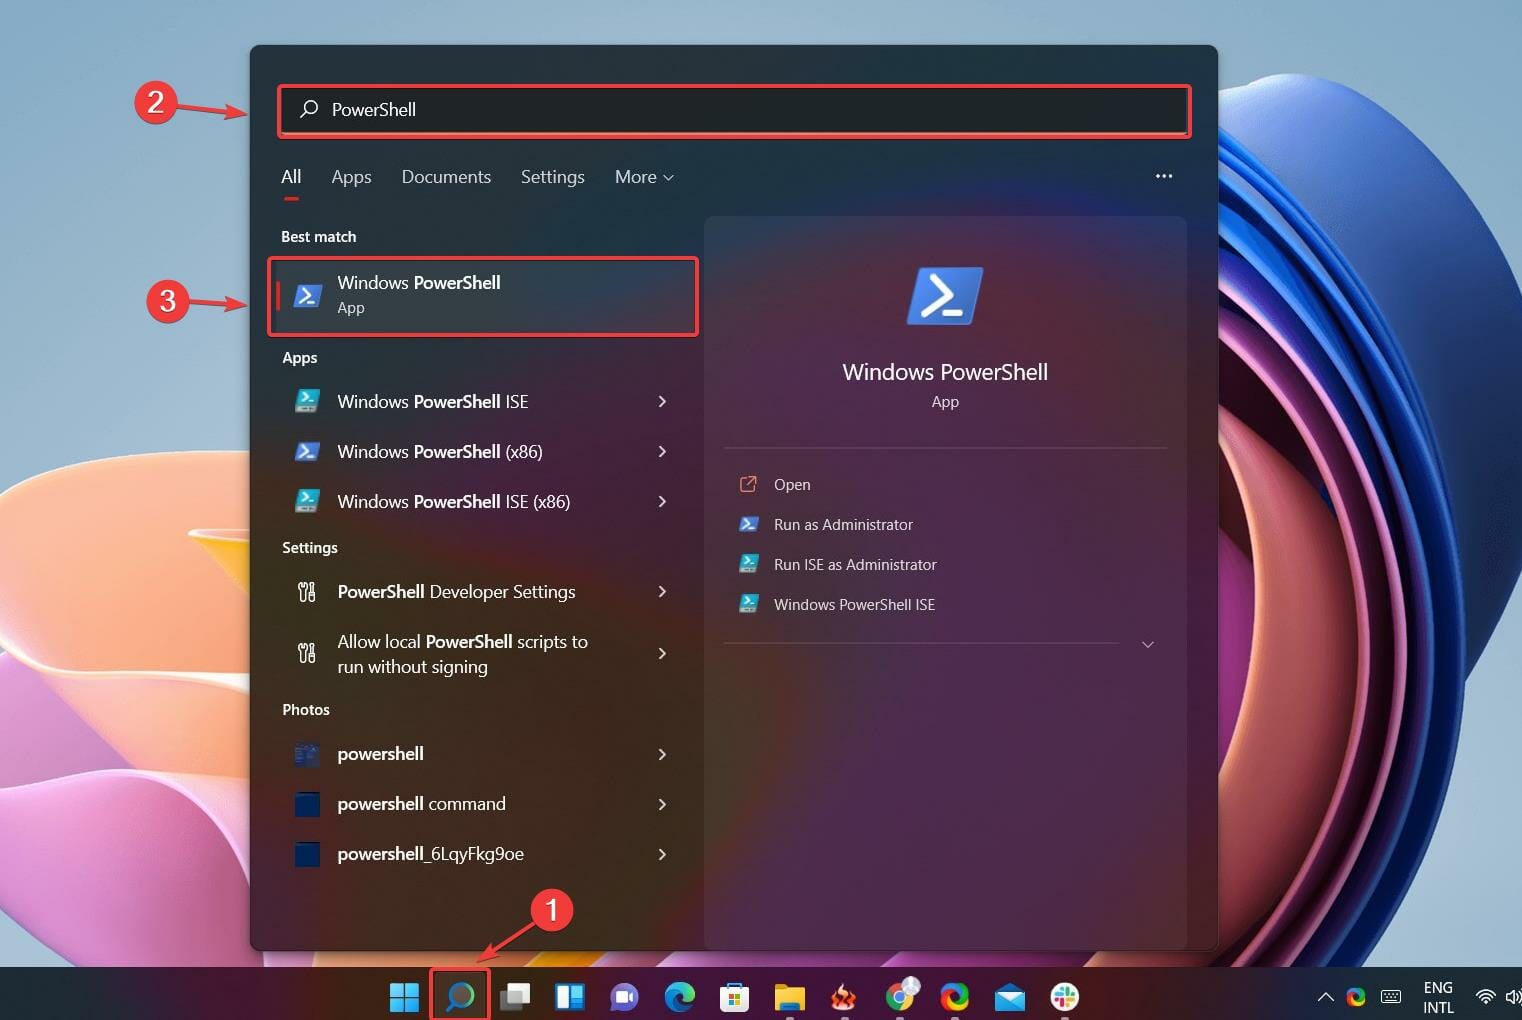
- Use the Search option on your taskbar, search for PowerShell and open the application.
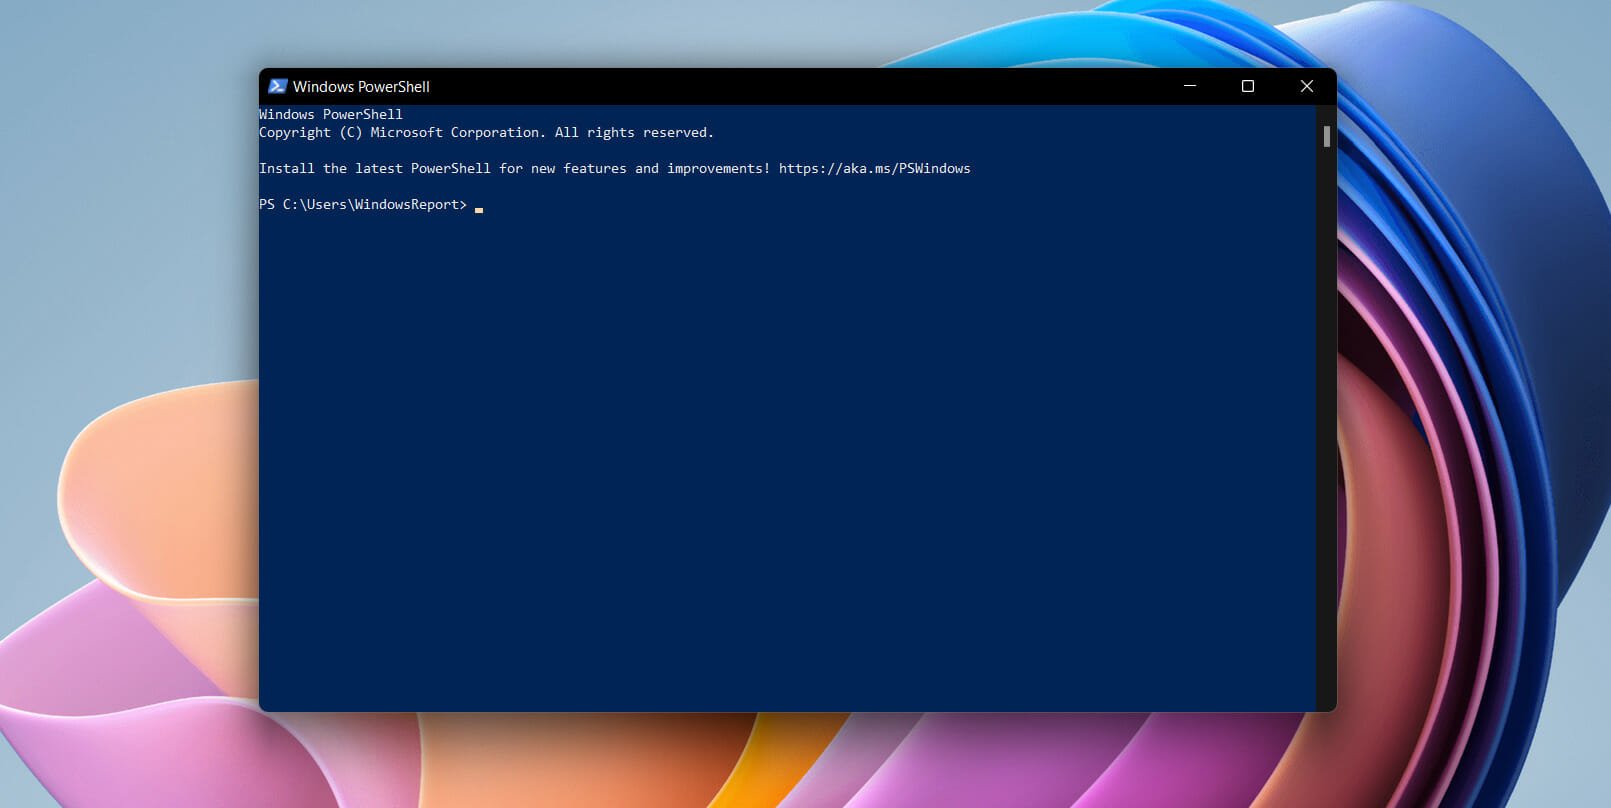
- Run the following script in PowerShell.
$Teams = Get-Team

for ($i = 0; $i -lt $Teams.Count; $i++)
{
    "{0}: {1}" -f $i, $Teams[$i].DisplayName
}

# multiple can be selected if comman seperated
$Selection = (Read-Host -Prompt "Select Team(s) to remove").Split(',').Trim()

foreach ($number in $Selection)
{
    $Teams[$number]
    #Remove-Team -GroupId $Teams[$number].GroupID
}

<# Output
0: TeamsOne
1: TeamsTwo
#>
All that’s left to do is prompt for the number of teams to remove and re-select it using the index number.
- Used the -f string format operator as it should allow you to assign the current iteration of $i to the choice number, and the Display Name of the teams; giving it a feel of choice selection.
- Using the .Split() method let’s you make a multiple choice selection given that it’s separated by a comma.
- Finally, use a foreach loop to iterate through the numbers input into our Read-Host assigned to $selection. Which gives you the same index number that will be used to select our choice from $Teams.
That’s pretty much the entire process, depending on which step you choose to take. Pretty simple, right?
Things are also quite simple if you want to remove OneDrive in Windows 11.
So, whether you just don’t want Microsoft’s Teams app to also start when your device does, remove it from your taskbar, or completely uninstall it, now you know how to do so in under two minutes.
Was this guide helpful to you? Let us know in the comments section below.
