Windows 10 HDR Won’t Turn On: 3 Ways to Fix
Quick fixes to get things up and running
- You can enable the HDR Stream option Windows 10 from the Display settings.
- If HDR Stream fails to stay on, you can fix it by following the troubleshooting steps listed in the article below.
- A faulty HDMI connection is the likely culprit for this issue.

On Windows 10, you can play HDR content when supported by your external or laptop display. However, several users have reported the Windows 10 HDR won’t turn on in the Microsoft forum.
If you are trying to figure out why HDR is not turning on, this issue can occur if you recently upgraded to the latest version of Windows 10. When trying to enable HDR stream settings, the HDR option fails to turn on.
In this article, we explore a few quick steps to help you resolve the Windows 10 HDR won’t turn on problem.
What can I do if Windows 10 HDR won’t turn on?
Here’s what you should first do:
- If you connect multiple HDR-enabled displays to your PC, ensure the multi-monitor setup is not causing the issue. If you are using a monitor plus TV setup, turn on HDR Stream with only your TV connected to the PC.
- In other instances, an incompatible HDMI cable can also cause HDR issues in Windows 10. HDR requires HDMI 2.0b cable to transmit the signal. If you are using an HDMI 1.4v cable, replace it with an HDMI 2.0b cable.
1. Enable the HDR option from Registry Editor
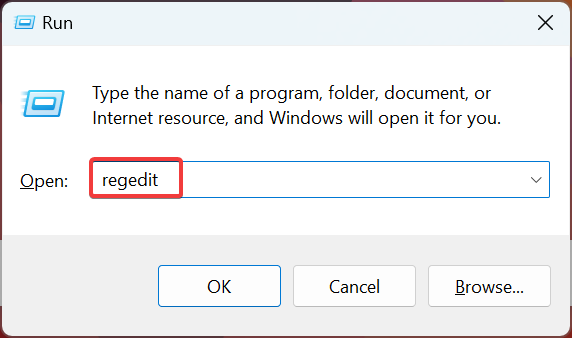
- Press the Windows + R to open Run, type regedit in the text field, and hit Enter.
- Click Yes when the UAC prompt appears.
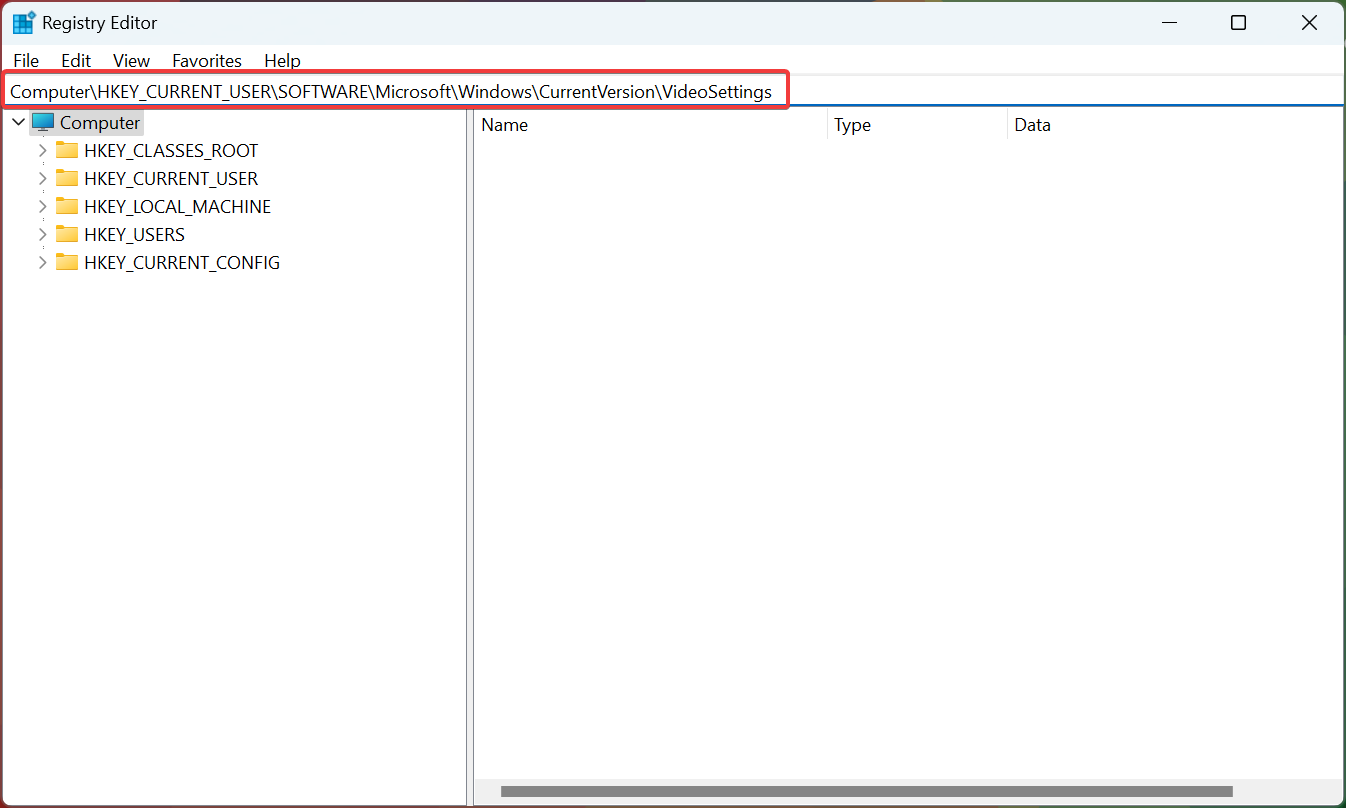
- Paste the following path in the address bar and hit Enter:
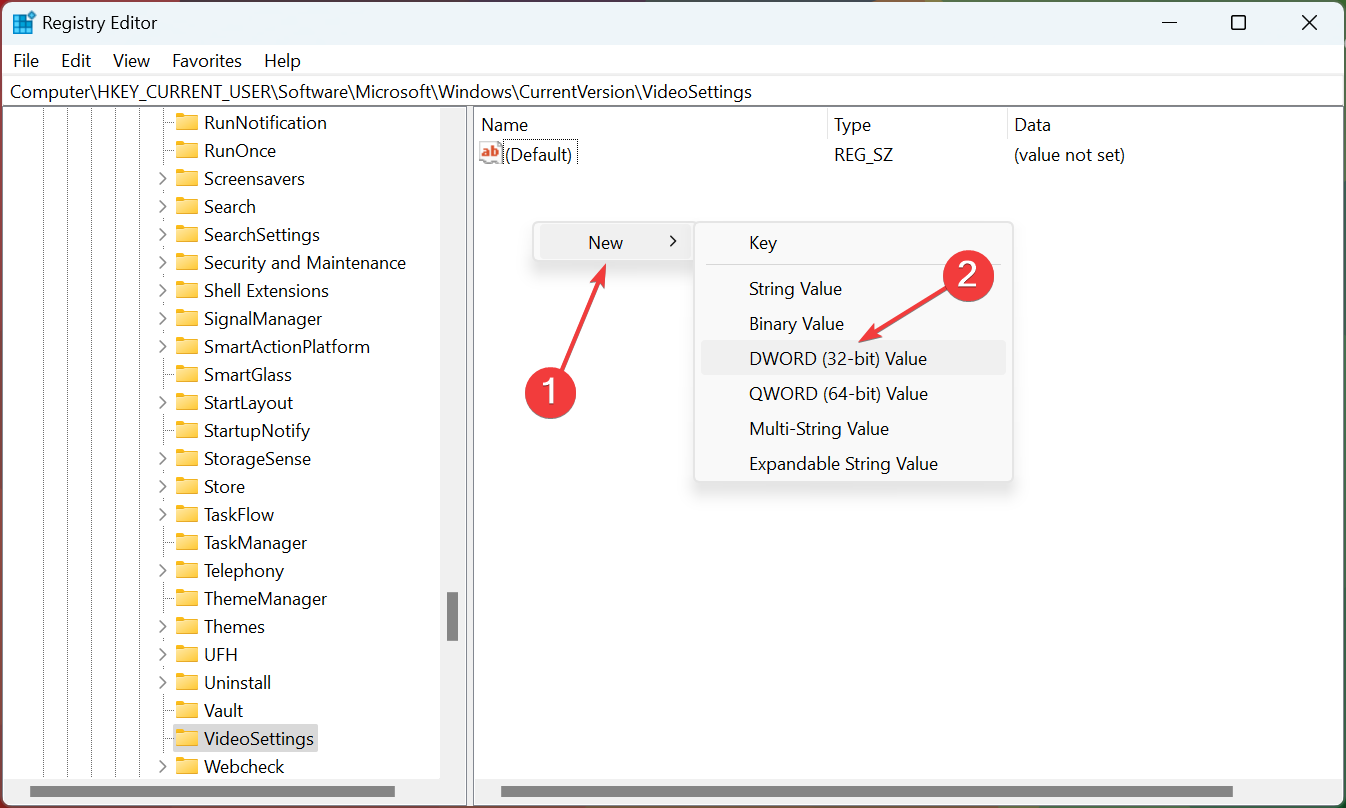
Computer\HKEY_CURRENT_USER\SOFTWARE\Microsoft\Windows\CurrentVersion\VideoSettings - Double-click the EnableHDRForPlayback entry. If you can’t find it, right-click on the blank portion, hover the cursor over New, select DWORD (32-bit Value), name it EnableHDRForPlayback, and then open it.
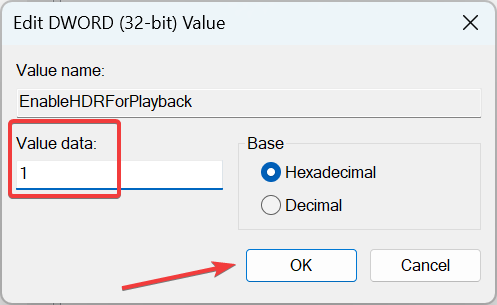
- Enter 1 in the Value data field, and click OK to save the changes.
- Once done, restart the computer for the changes to come into effect.
If HDR won’t stay on Windows 10, the registry fix usually works best for users. You should now be able to enable HDR from Settings.
2. Restore the device to the previous version
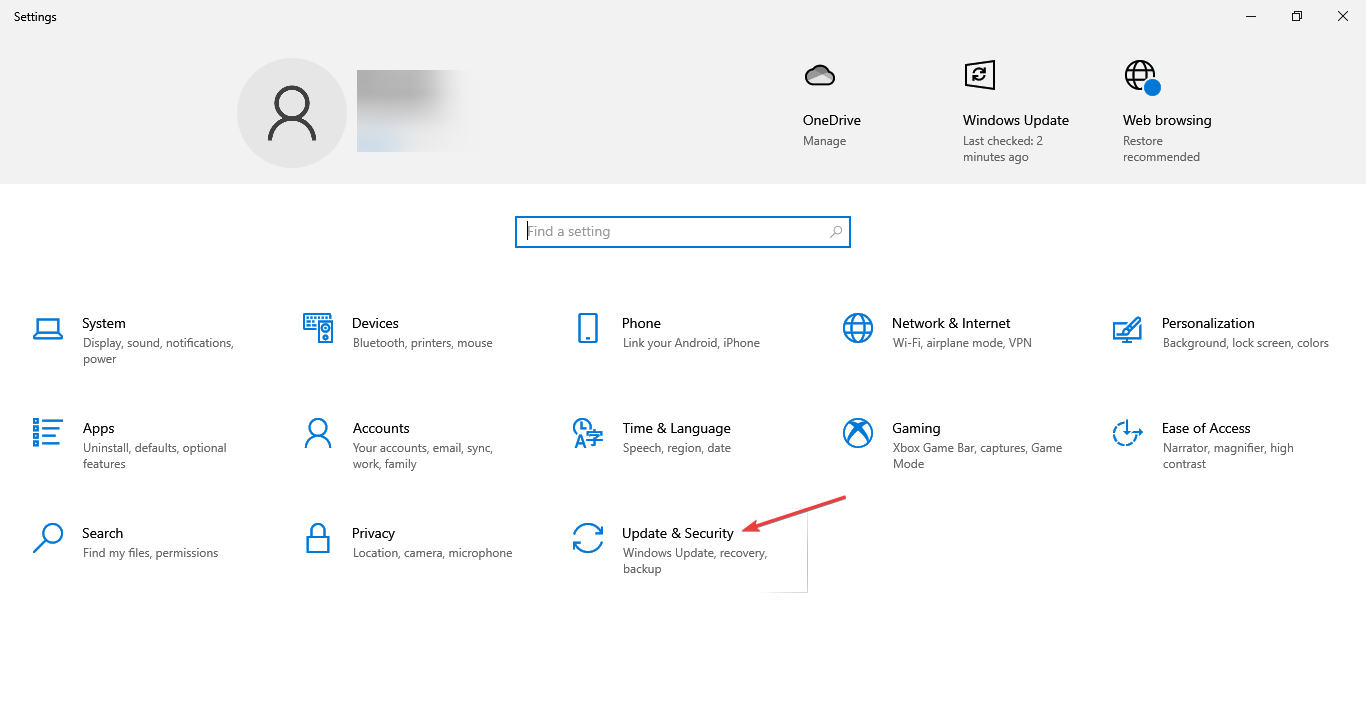
- Press the Windows + I to open Settings, and select Update & Security.
- Open the Recovery tab from the left pane.
- Scroll down to Go back to the previous version of the Windows 10 section.
- Click on Get started.
- Follow the on-screen instructions to restore your PC to the earlier version of Windows 10.
- Once restored, check if you can enable the Stream HDR option in settings.
If the issue occurred after upgrading to the latest version of Windows 10, you could restore the PC to the previous version of Windows OS to fix the issue.
Note that the Go back to the previous version of the Windows 10 option will not be available after 10 days of updating the system.
Going back to the previous version will also restore all the driver updates. So, you may have to install the update again to get the latest supported drivers for the PC hardware.
With all said, if the HDR Stream option is missing from your display, it is most likely due to your monitor or TV not supporting HDR technology. The Windows 10 HDR won’t turn on problem usually occurs due to a glitchy update or incompatible HDMI connection.
Follow the steps to troubleshoot and fix the HDR disabled issue on your Windows 10 computer.
Also, find out what to do if Windows 10 HDR is washed out. Do let us know which method helped you resolve the issue in the comments.
